Table of contents
Open Table of contents
Intro
I needed to find out how I can publish a static, server-side generated Next.js site to Azure Static Web Apps automatically from GitHub.
Prerequisites
- Azure subscription
- GitHub account
- Next.js static site
Next.js site
In this tutorial I will use Vercel’s Next.js example repository’s Blog starter as the base.
The project root level file structure is like this:
tree -L 1
.
├── @types
├── README.md
├── _posts
├── components
├── interfaces
├── lib
├── package-lock.json
├── package.json
├── pages
├── postcss.config.js
├── public
├── styles
├── tailwind.config.js
└── tsconfig.json
You can see the exact file structure and contents on GitHub via the link above.
In order to server-side generate the static site, I needed to slightly modify the build command on package.json by adding && next export to the build script:
{
  "private": true,
  "scripts": {
    "dev": "next",
    "build": "next build && next export",
    "start": "next start",
    "typecheck": "tsc"
  },
  "dependencies": {
    [omitted for brevity]
  },
  "devDependencies": {
    [omitted for brevity]
  }
}
While testing the build, I got an error about images. After some googling around, I ended up adding the following configuration in a new file next.config.js on the project root level:
module.exports = {
  images: {
    unoptimized: true,
  },
};
This got rid of the error and the site built successfully.
Azure Static Web App
The site is published on Azure Static Web Apps, which is relatively new hosting option on Azure, so next I created that.
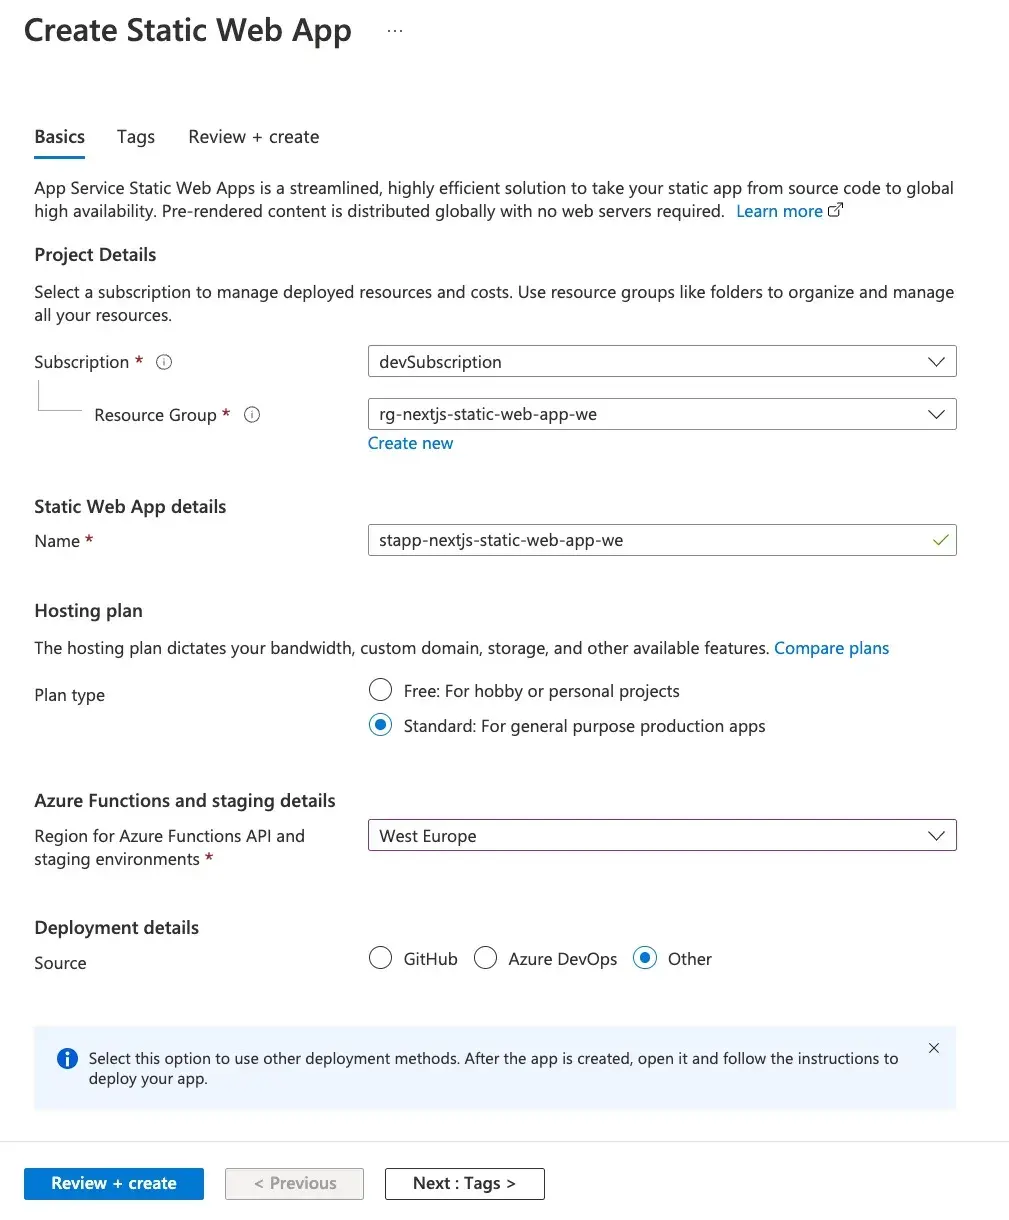
I chose the option Other as deployment method instead of using GitHub directly. In the end, both options will lead to the same end result, but I decided not to sign in with my GitHub credentials and provide Azure access to my organization’s repositories.
When the deployment finished, I was greeted with a ready hosting skeleton for the Next.js site, waiting for the site to be deployed.
The authentication / authorization for the deployment uses a token, which can be obtained from the front page of the Static Web App:
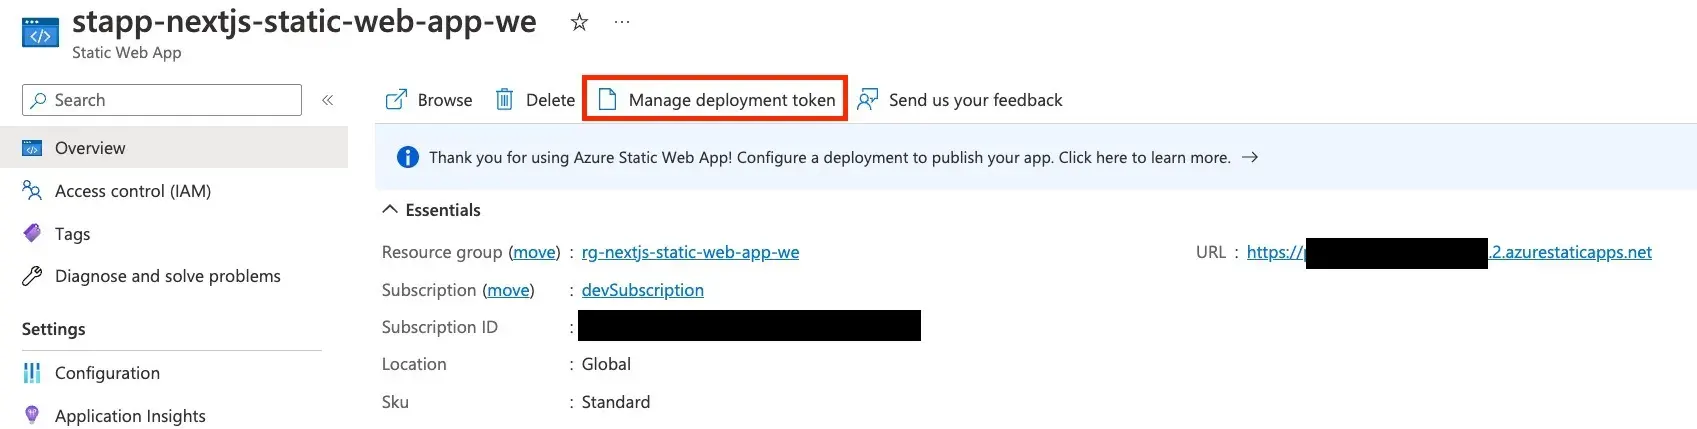
The token can be reset in the same place.
Creating the GitHub Actions workflow
The site is published automatically with GitHub Actions, when a new version is pushed to main branch. Microsoft provides all the necessary details for the action and configuration needed, but it is scattered across multiple docs, so I decided to gather it all together in this article.
Firstly, I stored the deployment token from the previous step on GitHub under the repository’s Settings as an Actions secret AZURE_STATIC_WEB_APPS_TOKEN:

Then, based on the Microsoft’s docs I added the workflow file to the project as .github/workflows/deploy-azure-static-webapp.yml:
name: Azure Static Web Apps CI/CD

on:
  push:
    branches:
      - main

jobs:
  build_and_deploy_job:
    if: github.event_name == 'push'
    runs-on: ubuntu-latest
    name: Build and Deploy Job
    steps:
      - uses: actions/checkout@v2
        with:
          submodules: true
      - name: Build And Deploy
        id: builddeploy
        uses: Azure/static-web-apps-deploy@v1
        with:
          azure_static_web_apps_api_token: ${{ secrets.AZURE_STATIC_WEB_APPS_TOKEN }}
          repo_token: ${{ secrets.GITHUB_TOKEN }} # Used for Github integrations (i.e. PR comments)
          action: "upload"
          app_location: "/"
          api_location: ""
          output_location: "out"
        env:
          is_static_export: true
Few notes on the workflow:
- New version of the site is (only) built and released when a new code version is pushed to branch
main. - Build and deployment are done with the same Action provided by Microsoft.
app_location: "/"source code is in the root of the repositoryapi_location: ""The site does not have APIsoutput_location: "out"Statically generated Next.js site will be inoutdirectory.- Environment variable
is_static_export: trueThe site is statically built.
After pushing the changes to GitHub, I got to enjoy rather fast Next.js site.
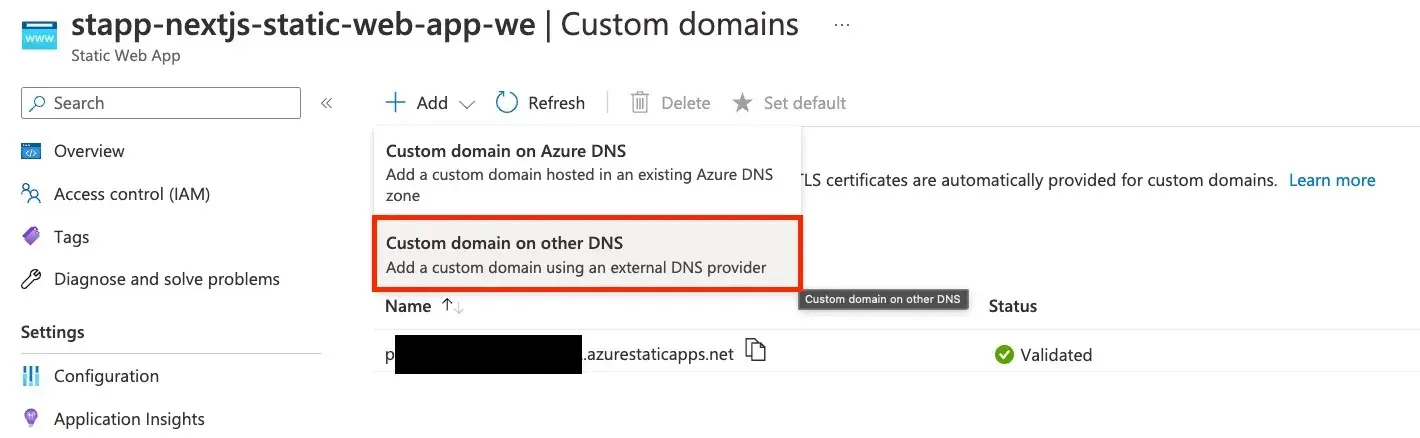
Adding custom domain
Azure Static Web Apps supports custom domains. In Azure portal, under Settings > Custom domains I added the domain, and since in this case the DNS is not managed in Azure, I selected the option Custom domain on other DNS:
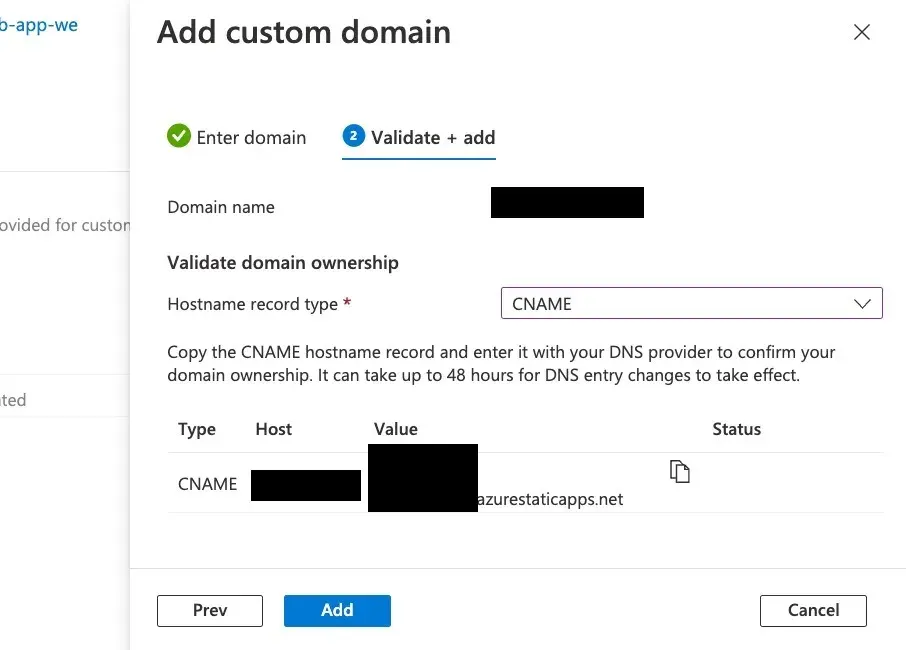
After entering the domain, I needed to add a new CNAME record to the DNS configuration and wait for Azure to validate it. The details were provided by Azure:
Now the whole hosting configuration and DevOps pipeline were ready to be used.